I’ve sung the praises of Greek ingredients many times and now is the time for Dutch ingredients and particularly strawberries.

Dutch strawberries are small and sweet, with a reddish-pink color and in one word, awesome. There’s really not much more to say; they’re delicious beyond description.

While in Greece, I made strawberry jam and spoon sweet using local strawberries. I made the exact same thing here in Holland with Dutch strawberries and it was like tasting two completely different things.

The version made with the Dutch berries was tastier with a fuller flavor of the fruit bursting in my mouth with every spoonful and far more aromatic. There’s no better test than that in my book; using the same ingredients and seeing the resulting differences.

I have been making this strawberry jam for years. I’ve mentioned it before, promising that one day I’ll share the recipe. Well, the time has come, finally.
It’s pretty straightforward and quite quick as well; no macerating of the berries is required, which undoubtedly makes things easier. You clean and hull the strawberries, making sure to halve any that are big; this isn’t of course the case with Dutch strawberries that are invariably small and cute.

The secret to this jam is twofold. First, it’s the lemon seeds that are put inside a muslin cloth and into the pan along with the berries as they simmer, thus omitting the need for artificial pectin and second, the vanilla seeds that bring an incomparable flavor and aroma to the jam.

This jam can be as thick or thin as you like it. I usually prefer it on the thinner side as this gives me the chance to enjoy the small berries in all their juiciness and sweetness and not mashed into oblivion, but also because I can use the syrup that usually remains, to make strawberry drinks of any kind.

Of course, for those of you looking for a more traditional jam consistency, you can simmer the berries for longer and mash them as they cook inside the pan.

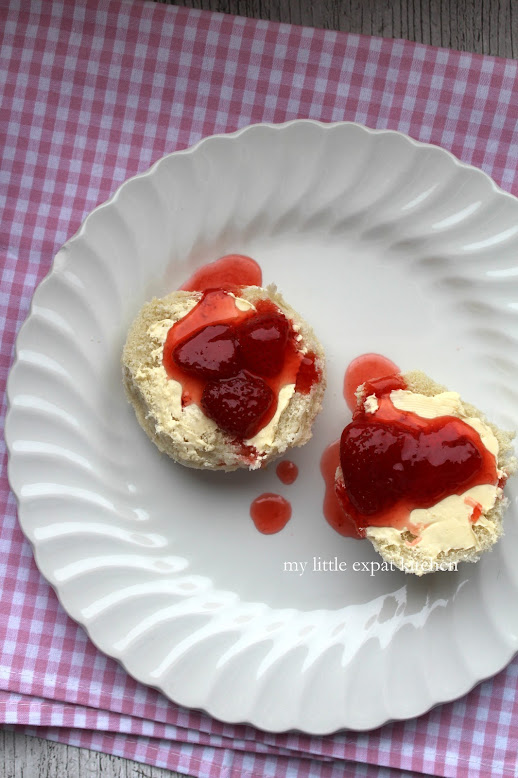
I have made it twice already and I’m planning on making it a couple more times before the strawberry season ends. On top of cakes and crepes, yoghurt or ice cream, on top of buttered bread, straight from the jar with a big old spoon, I simply can’t get enough of it.

Strawberry Jam with Vanilla
Needless to say, the more aromatic and flavorful the berries you use, the more tasty the jam will be. Choose strawberries that are ripe but not overripe.
I use a thermometer to determine the setting of the jam but it is not necessary. The simple sauce-in-the-freezer technique described in the recipe, works just as well.

Yield: about 1.5 liters / I usually end up with 4 medium jars of jam
Ingredients
1.5 kg fresh strawberries, hulled and halved lengthwise if too big
1 Tbsp water
2 tsp lemon seeds
1 vanilla bean, cut in half lengthwise and seeds scraped
1 kg caster sugar
120 ml lemon juice
Special equipment: muslin or cheesecloth, twine, sugar/candy thermometer (optional), potato masher (optional), glass jars with lids
Preparation
In a large, heavy-bottomed pan, add the strawberries and the water and cook over medium heat for about 15 minutes, stirring occasionally with a wooden spoon, until the strawberries soften.
Place the lemon seeds inside a piece of muslin or cheesecloth and tie it with twine to the handle of the pan. You need to make sure that the lemon seeds are immersed in the fruits. Add the cut vanilla bean as well as the scraped seeds, followed by the sugar and the lemon juice, stir with a wooden spoon until the sugar is dissolved and turn heat up to high. Bring to the boil and place the sugar thermometer in the pan, if you’re using. Turn heat down to medium and cook for 20-25 minutes, depending on how thick you want your jam, or until the thermometer reads 105 degrees Celsius / 220 Fahrenheit (known as the setting point), and making sure to stir it from time to time. If you want to mash the fruit, do it gently with a potato masher while the jam is simmering.
Note: As the jam simmers, remove the scum that forms on top with a metal spoon in order to have a clear jam.


If you don’t have a thermometer, you can check if the jam is ready by doing the following: Put a small plate in the freezer for 5 minutes. Take it out and spoon a little of the jam on it. Leave to cool for 1 minute and then push the jam with your finger; the top should wrinkle. If not, boil for a couple of minutes longer and test it again. Keep in mind though that once the jam cools, it will thicken.
When the jam is ready and the consistency is to your liking, remove the vanilla bean and the muslin cloth with the lemon seeds from the pan. Pour the jam into sterilized jars and turn the jars upside down. (Read here on how to sterilize glass jars). Once the jam has cooled completely, put the jars in the refrigerator.
The jam will keep for several weeks in the fridge.


Dutch strawberries are small and sweet, with a reddish-pink color and in one word, awesome. There’s really not much more to say; they’re delicious beyond description.

While in Greece, I made strawberry jam and spoon sweet using local strawberries. I made the exact same thing here in Holland with Dutch strawberries and it was like tasting two completely different things.

The version made with the Dutch berries was tastier with a fuller flavor of the fruit bursting in my mouth with every spoonful and far more aromatic. There’s no better test than that in my book; using the same ingredients and seeing the resulting differences.

I have been making this strawberry jam for years. I’ve mentioned it before, promising that one day I’ll share the recipe. Well, the time has come, finally.

It’s pretty straightforward and quite quick as well; no macerating of the berries is required, which undoubtedly makes things easier. You clean and hull the strawberries, making sure to halve any that are big; this isn’t of course the case with Dutch strawberries that are invariably small and cute.

The secret to this jam is twofold. First, it’s the lemon seeds that are put inside a muslin cloth and into the pan along with the berries as they simmer, thus omitting the need for artificial pectin and second, the vanilla seeds that bring an incomparable flavor and aroma to the jam.

This jam can be as thick or thin as you like it. I usually prefer it on the thinner side as this gives me the chance to enjoy the small berries in all their juiciness and sweetness and not mashed into oblivion, but also because I can use the syrup that usually remains, to make strawberry drinks of any kind.

Of course, for those of you looking for a more traditional jam consistency, you can simmer the berries for longer and mash them as they cook inside the pan.

I have made it twice already and I’m planning on making it a couple more times before the strawberry season ends. On top of cakes and crepes, yoghurt or ice cream, on top of buttered bread, straight from the jar with a big old spoon, I simply can’t get enough of it.

Strawberry Jam with Vanilla
Needless to say, the more aromatic and flavorful the berries you use, the more tasty the jam will be. Choose strawberries that are ripe but not overripe.
I use a thermometer to determine the setting of the jam but it is not necessary. The simple sauce-in-the-freezer technique described in the recipe, works just as well.

Yield: about 1.5 liters / I usually end up with 4 medium jars of jam
Ingredients
1.5 kg fresh strawberries, hulled and halved lengthwise if too big
1 Tbsp water
2 tsp lemon seeds
1 vanilla bean, cut in half lengthwise and seeds scraped
1 kg caster sugar
120 ml lemon juice
Special equipment: muslin or cheesecloth, twine, sugar/candy thermometer (optional), potato masher (optional), glass jars with lids
Preparation
In a large, heavy-bottomed pan, add the strawberries and the water and cook over medium heat for about 15 minutes, stirring occasionally with a wooden spoon, until the strawberries soften.
Place the lemon seeds inside a piece of muslin or cheesecloth and tie it with twine to the handle of the pan. You need to make sure that the lemon seeds are immersed in the fruits. Add the cut vanilla bean as well as the scraped seeds, followed by the sugar and the lemon juice, stir with a wooden spoon until the sugar is dissolved and turn heat up to high. Bring to the boil and place the sugar thermometer in the pan, if you’re using. Turn heat down to medium and cook for 20-25 minutes, depending on how thick you want your jam, or until the thermometer reads 105 degrees Celsius / 220 Fahrenheit (known as the setting point), and making sure to stir it from time to time. If you want to mash the fruit, do it gently with a potato masher while the jam is simmering.
Note: As the jam simmers, remove the scum that forms on top with a metal spoon in order to have a clear jam.


If you don’t have a thermometer, you can check if the jam is ready by doing the following: Put a small plate in the freezer for 5 minutes. Take it out and spoon a little of the jam on it. Leave to cool for 1 minute and then push the jam with your finger; the top should wrinkle. If not, boil for a couple of minutes longer and test it again. Keep in mind though that once the jam cools, it will thicken.
When the jam is ready and the consistency is to your liking, remove the vanilla bean and the muslin cloth with the lemon seeds from the pan. Pour the jam into sterilized jars and turn the jars upside down. (Read here on how to sterilize glass jars). Once the jam has cooled completely, put the jars in the refrigerator.
The jam will keep for several weeks in the fridge.

Tidak ada komentar:
Posting Komentar