Tampilkan postingan dengan label Dutch. Tampilkan semua postingan

Jumat, 20 Desember 2013

Zeeuwse Speculaas

Unintentionally, cookie week took on an international character. I wasn’t planning on doing that but it turned out that way which is rather interesting, don’t you think?


I started with American cookies, went on to Italian and now it’s time for Dutch.


I have mentioned many times before how much I dislike some of the Dutch culinary traditions, but at the same time how impressed I am by their confections and pastries.


I constantly discover new Dutch sweet treats to love and they are so incredibly delicious they can become addictive. In the summer of 2012, when S and I traveled to the southwestern province of Zeeland, I discovered some more; the Zeeuwse bolus, the kruidkoek and the Zeeuwse speculaas.


I shared the recipe for Dutch speculaas cookies three years ago, along with pepernoten and gevulde speculaas (speculaas cake filled with Dutch almond paste). I gave you a glimpse of the Zeeuwse speculaas in this post (go all the way down to the last picture) and I promised to share a recipe. Well, better late than never.


This version of Dutch speculaas appealed to me because the cookies didn’t have that intense taste of spices of the common speculaas. They were milder without lacking in flavor and when I made them myself, I was thrilled that they were exactly how I remembered them to be.


Zeeuwse speculaas are crispy, with a crunchy exterior from the raw caster sugar that covers them. Made with cinnamon, light brown sugar and only a pinch of nutmeg, their flavor is mellow yet unbelievably deep and that is because as soon as the dough is made, it is placed in the fridge for twenty-four hours. During this time, the flavors get to know each other, mature and intensify, creating the most aromatic and flavorsome speculaas cookie there is.


Happy baking!


Zeeuwse Speculaas (Dutch Cookies from Zeeland)

These are traditionally made with Zeeuwse bloem, a type of flour from Zeeland which has a low percentage of gluten (8-9%) that gives cookies a soft and light texture. You can substitute with pastry flour or you can do as I did and use all-purpose flour along with some corn flour.

These are traditionally shaped into wind-mills or clogs using speculaas molds but since it’s Christmas, I opted to use Christmas tree- and star-shaped cutters. You can make them any time of the year, giving them the shape you prefer.

If you don’t have caster sugar, which is finely granulated white sugar, then in a small food processor, add white granulated sugar and process it for a few seconds until it becomes fine. Be careful not to overprocess because it will turn to icing sugar.


Yield: 26 tree-shaped cookies (10 cm x 6.5 cm)

Ingredients
230 g all-purpose flour
20 g corn flour
11 g baking powder
1 heaped tsp cinnamon
Pinch of nutmeg
Pinch of sea salt
150 g unsalted butter, at room temperature, cut into pieces
125 g soft light brown sugar
1 Tbsp lemon juice

Icing sugar, for the cookie cutters

Caster sugar, for covering the speculaas

Special equipment: sieve, food processor, plastic wrap, rolling pin, 1-2 baking sheets, baking paper, tree-shaped cookie cutters


Preparation
Sieve the all-purpose flour together with the corn flour two times in a bowl. Add the baking powder, the cinnamon, nutmeg and salt and sieve all the ingredients together. Transfer dry ingredients to the bowl of a food processor and add the butter pieces, sugar, and lemon juice.
Process until the mixture resembles coarse breadcrumbs.


Empty it onto a clean work surface and start bringing it together with your hands and kneading it. At first, it may seem like it won’t come together into a smooth dough but after 3-4 minutes, as the butter will be incorporated and dispersed throughout the mixture, it will. Knead until you have a smooth dough that holds together perfectly, yet cracks ever-so-slightly.


Shape dough into a disk and wrap it very well with plastic wrap. Place it on a plate and in the fridge for 24 hours.

Remove the dough from the fridge 1 hour before you roll it out, because it needs to be pliable. If you try to roll it out straight from the fridge it will be too hard and it will break into pieces.

Place the disk of dough between two sheets of baking paper and with the help of a rolling pin, roll it out to 0.5-0.7 cm-thickness. Place the rolled-out dough in the fridge for 10-15 minutes to firm up.

Line your baking sheet(s) with baking paper.
Preheat your oven to 180 degrees Celsius / 350 Fahrenheit.


In a small bowl, add some icing sugar and use it to dip in your cookie cutter. In this way, the cookie cutter won't stick to the dough.
Remove the top baking paper from your rolled-out dough and using your cookie cutter, cut out tree shapes and place them on your prepared baking sheet, spacing them 1.5 cm apart.
The dough will spread very little.

Note: It's best if you transfer the cut-out cookies from the baking paper to your baking sheet using a small offset spatula. This way you ensure the shape of the cookie remains intact. You need to work fast because the dough becomes warmer and softer as time passes.
Note: Gather scraps of dough, roll out again, place in the fridge to firm up and then cut out cookies. Repeat until all the dough is used up.

Place the baking sheet on the middle rack of your preheated oven and bake the cookies for 12-13 minutes, until just set in the middle and they have taken on a golden color. Be careful not to burn them.

Note: If you choose a different cookie cutter, either smaller or bigger, or even of a different shape than the one indicated, the baking times will change. Keep a close eye on your cookies while baking so you avoid any surprises.


Remove the baking sheet from the oven and place the second one in. Allow the cookies to stand for 2-3 minutes.

In the meantime, in a large plate or baking pan, add plenty of caster sugar. Transfer the cookies directly from the baking sheet onto the sugar, a few at a time, and coat them well on all sides.


Then transfer them to a wire rack to cool.

Store them in a cookie tin for up to a week.

Before you eat them, brush off some of the sugar from the speculaas.


Kamis, 17 Oktober 2013

Dutch apple turnovers - Appelflappen


It’s cold outside these days, with rain that at times seems to go on forever.


It’s been dark, gloomy and for the most part, I enjoy it. I needed a change of seasons somehow, put on my woolen socks, stay in with a good book, turn on the oven and bake.


I’m baking quite a lot these days, whenever I can scare up some free time that is, because I’ve been pretty busy with work. One of the things I made was these Dutch pastries. When it comes to pastries, let me tell you, the Dutch are good. A testament to that is the Appeltaart (Dutch apple pie) but these puff pastry beauties are equally delicious.


These are the Dutch appelflappen (singular: appelflap) aka apple turnovers and they are little baked triangles of crisp puff pastry filled with grated apples, dark brown sugar and warming spices. They are traditionally drenched in icing sugar, the Dutch love their icing sugar on pastries, but they’re even more scrumptious when paired with a chantilly cream spiked with whiskey.


Apples, spices and single malt; it’s a match made in heaven, guaranteed to warm you up on a chilly autumn day.


Appelflappen (Dutch Apple Turnovers) with Whiskey Chantilly Cream

Apple season is here and you can take your pick with the apples you could use. I chose Goudrenet (a Dutch variety) but Granny Smith or any other type of good tart apple will do.
You can make these with homemade puff pastry or store-bought. Just make sure it is made with butter. It makes a difference.


Yield: 8 appelflappen

Ingredients

for the appelflappen
350 g (2 large) tart apples (Goudrenet or Granny Smith)
2 tablespoons soft dark brown sugar
¾ teaspoon ground cinnamon
Pinch of grated nutmeg
1 sheet ready-made puff pastry (40 x 24 cm), defrosted

1 small egg, lightly beaten, for glazing the pastries
Icing sugar and cinnamon, for sprinkling over the pastries

for the whiskey cream
250 ml cream, full-fat (35%)
2 tablespoons caster sugar
2 tablespoons single malt whiskey

Special equipment: box grater, baking sheet, baking paper, pastry brush, stand or hand-held electric mixer


Preparation

for the appelflappen
Peel the apples and grate them coarsely into a bowl. Add the sugar, cinnamon and nutmeg and mix well with a spoon.

Preheat oven to 200 degrees Celsius / 290 Fahrenheit.
Line a large baking sheet with baking paper.

Lay the puff pastry on a piece of baking paper and cut it into 8 equal squares, trimming off any excess pastry. Place about 1 tablespoon of filling in the center of each square, fold it over to create a triangle and press edges together with a fork to seal. Transfer pastries onto the prepared baking sheet, brush them with the beaten egg and prick the tops with a fork.
Bake for about 20 minutes on the middle rack of the oven until golden-brown and puffed.
Remove from the oven and allow to cool slightly.

Serve sprinkled with some icing sugar and cinnamon, and a dollop of whiskey chantilly cream on the side.

Note: If you have any of the apple mixture leftover, don’t throw it away. It is delicious served on top of some thick Greek yoghurt. Even the syrup that will accumulate at the bottom of the bowl with the grated apples, sugar and spices is wonderful to drink as a liqueur of sorts.

for the whiskey cream
In the bowl of a stand mixer (or in a large bowl and using a hand-held mixer), beat the cream and sugar with the whisk attachment on high speed until soft peaks form. Add the whiskey and beat until stiff peaks form.
Keep chantilly cream refrigerated until ready to use.


Kamis, 11 April 2013

Poffertjes – Dutch mini pancakes

Holland is not famous for its culinary heritage and the Dutch will attest to that themselves. Their influences are so varied that everything is kind of intertwined. Flavors from Indonesia and Surinam (former Dutch colonies), from Morocco and Turkey, the Caribbean and the Middle East are all evident in Dutch cooking. The use of spices is prominent, they were the kings of the spice trade after all, and there is a strong influence from the French and German cuisines as well.


When people ask me to describe Dutch cuisine for them, I never know what to say exactly. The traditional Dutch food is based on mash and meat, soups and stews that are not at all appealing to my Mediterranean palate. I find them bland, boring and uninteresting. There are exceptions of course like their heavenly and famous cheeses, the bitterballen (meat-based fried snack) and other meaty and cheesy snacks, but where the Dutch really shine, is in their sweets. There the Dutch have something special going on for them.


It all started with the stroopwafel (thin waffle filled with caramel syrup), the first ever Dutch sweet I had in Holland; I swooned when I ate that. Then came the olieballen, large doughnut fritters filled with apples and cinnamon drenched in icing sugar, then came the bosche bollen, a riff on the French profiteroles but bigger, lighter and with more chocolate and cream, then the Dutch panenkoeken (large thin crepes) that are the best, and finally the little poffertjes.


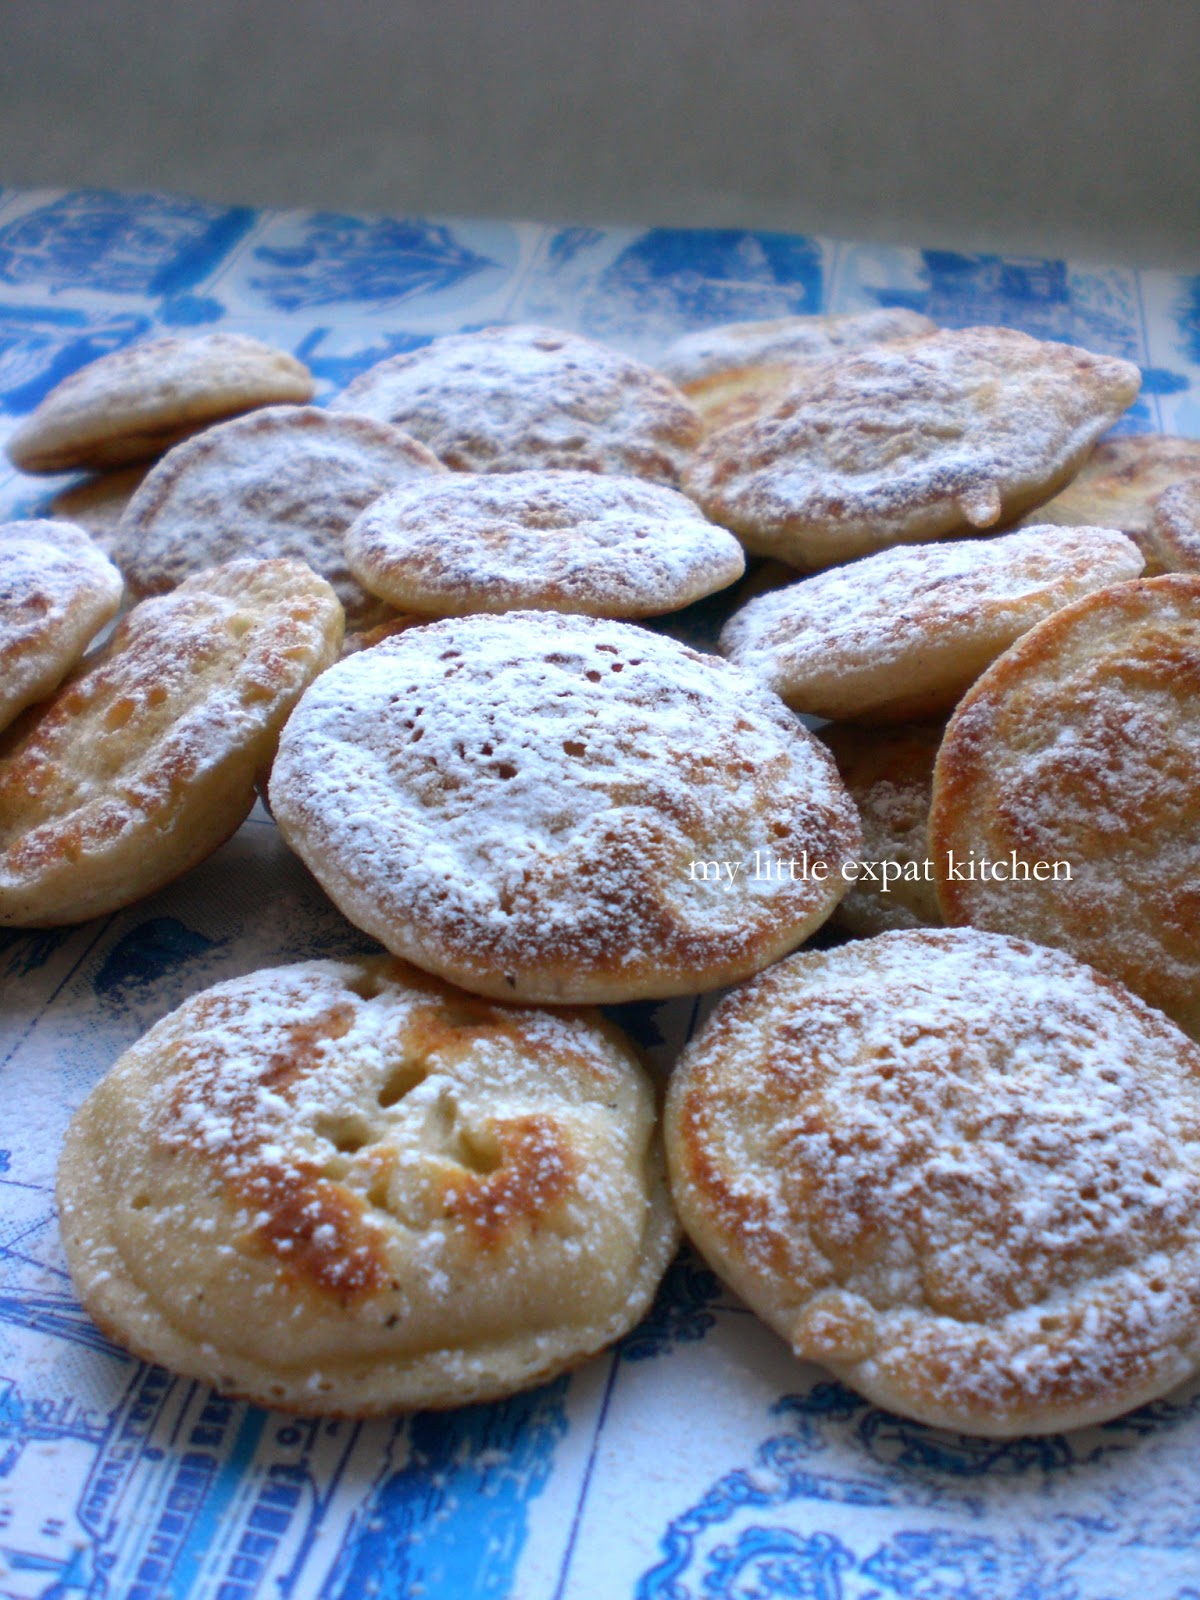
Poffertjes are small pancakes made in a traditional poffertjesplaat, a special pan that has indentations which give the poffertjes their characteristic puffed up appearance on both sides. Poffertjes date back to the 17th century when Dutch monks used to offer them as hosts. During the French revolution, there was a shortage in wheat-flour so the monks started making the batter with buckwheat flour; the end result was a thicker and tastier host. Today, poffertjes are commonly made with a combination of wheat and buckwheat flour.


They are about two centimeters in diameter, they have a light, spongy and fluffy texture with a slightly creamy center and their flavor is somewhat neutral. They’re not sweet, as the batter doesn’t contain any sugar, which is why they are traditionally accompanied by copious amounts of icing sugar and are dotted with salted butter that slowly melts over the warm mini puffed-up disks.


If you ever travel to the Netherlands and visit any type of fair, you will see stalls making and selling these little beauties by the hundreds; the Dutch love them, especially the kids. Below you can see how they make them in Volendam.


You would, with good reason, think this is a breakfast kind of pancake but no, the Dutch don’t eat poffertjes for breakfast. To them, it’s a sweet snack, enjoyed any other time of the day, but you can cheat and have these with a hot cup of coffee in the morning. No one needs to know.


Poffertjes – Dutch Mini Pancakes
Adapted from Janny de Moor

I understand that most of you will not have a poffertjesplaat (pan) to make these but don’t be discouraged because you can certainly make them in a regular non-stick or cast-iron pan. They will not have a two-sided puff but that’s fine, the taste is what matters the most.

If you have a squeeze bottle, it will be easier to fill the indentations of your poffertjes pan or make mini pancakes in a regular pan.

In Holland they may be traditionally served with butter and icing sugar but you can treat them as typical pancakes and douche them in maple syrup, honey or a berry coulis, or serve them with fruits and whipped cream.


Yield: about 100 (I know, it sounds a lot, but trust me, they are very small and if you have people over for brunch, they will disappear in a flash. Also, you can reheat them the next day and have them for breakfast)

Ingredients
4 g instant dried yeast
150 g all-purpose flour, sieved
100 g buckwheat flour, sieved
300 ml lukewarm whole milk
2 large eggs, beaten lightly with a fork
Pinch of salt

100 g unsalted butter, melted, for greasing the pan

Butter, for serving
Lots of icing sugar, for serving

Special equipment: sieve, wire whisk, measuring jug or poffertjes bottle (squeeze bottle), poffertjes pan or regular non-stick pan (or cast-iron pan)


Preparation
In a large bowl, add the yeast, the sieved flours, half of the milk and the beaten eggs and whisk until you have a stiff dough. Add the rest of the milk followed by the salt and whisk well until you have a smooth batter without any lumps. The batter will be runny.
Cover the bowl with a damp kitchen towel and place at a warm place for about 1 hour to rise. It should look bubbly.
Whisk again lightly and empty the batter which will be slightly runny, in a measuring jug or a poffertjes bottle which is a squeeze bottle.


Using a poffertjes pan
Heat your poffertjes pan over a medium-high heat and when hot, grease the whole pan, not just the holes, with melted butter. Fill all the holes with batter by ¾ and cook for 3-4 minutes on one side. Once you see that they’re dry on top with small holes and the bottom is golden brown, it’s time to turn them over with one or two forks and let them cook on the other side for 2-3 minutes until they are golden brown. (A two-pronged fork is traditionally used to flip over the poffertjes and remove them from the pan). Be careful not to overcook them. You want the centers to be creamy and just set, not dried out.
Remove them from the pan and onto a plate, grease the pan again with melted butter and continue coking the next batch. Continue in the same manner until you have no more batter left.


Using a non-stick (or cast-iron) pan
Heat the pan over medium-high heat and when hot, grease the bottom with melted butter. Add 1-2 tablespoonfuls of batter to create each poffertje. Each one should be around 6 cm in diameter. Space them well apart, otherwise you might end up with one large pancake. Cook for 3-4 minutes on one side. Once you see that they’re dry on top with small holes and the bottom is golden brown, it’s time to turn them over with one or two forks and let them cook on the other side for 2-3 minutes until they are golden brown. Be careful not to overcook them. You want the centers to be creamy and just set, not dried out.
Remove them from the pan and onto a plate, grease the pan again with melted butter and continue coking the next batch. Continue in the same manner until you have no more batter left.

Poffertjes are eaten hot. Serve them, dotted with salted (or unsalted if you wish) butter and a generous sprinkling of icing sugar.

If you have any poffertjes left, you can reheat them in the microwave the next day. They will not be as good as the first day you made them but still, they’ll be enjoyable.


Kamis, 19 Januari 2012

My two passions

Half of the second floor of our apartment is a music studio. I don't know if I have told you this before but S and I are both musicians. S plays electric guitar and writes music and I sing.


When I first met S, more than ten years ago, we formed a band with three other musician friends. We used to rehearse in our drummer's home studio and at those god forsaken rehearsal studios in downtown Athens, filled with cigarette ashes and smoke and crazy music coming out of every other door you'd pass by. Friends would come to our rehearsals and jam sessions and it would become one big party. Until the real party would begin. The real gig.


We'd play all around Athens, in small pubs and bigger clubs, sometimes just in front of friends and acquaintances, and others in front of crowds of total strangers who danced and clapped and sang along and drank and applauded and had a good time; all because of us, of our music. That was probably the most joyous, carefree and fun period of my life.


Through the years, the band changed members and it eventually broke up, but the music never stopped for S and me. It's impossible for anyone who loves music as much as we do, to just give it up. Instead, much like ourselves, our music grew and evolved, and when opportunity came knocking, we opened the door wide open.


S, among other music album collaborations, has co-written the soundtrack for three Greek films that were released in theaters all around Greece and I have contributed several songs in the soundtrack of two of those films. Our music and vocals for two of the soundtracks were recorded here, in our apartment in Holland, in our little home studio.


When we went to Greece two years ago for the opening night of one of the films, at the Athens film festival "Νύχτες Πρεμιέρας" (Opening Nights), and actually heard the music coming out of the big loud theater speakers, it was an otherworldly experience. I could not believe it was me that was heard singing when on the big screen an actual film was being played. It was extraordinary.


Getting paid to do something that you really love is like nothing else in the world. Granted, we can't actually make a living from music, but that's what our day jobs are for. Besides, like true romantics, we are not in it for the money but for the feeling that we get when we create music and share ideas.
It is when I sing that I'm truly happy.


Creativity for me equals happiness. It is impossible to say the word "happiness" without humming a tune or without having the desire to go into the kitchen and cook. My two passions, singing and cooking.


Making bread is perhaps the most primitive form of cooking. The kneading, the tucking of the dough, the warmth needed for it to proof, expand and grow, all that remind me of the process that I go through when I create a melody for a song, when I write lyrics and when I sing. I need my time, my space to feel the music. My mind travels wherever the rhythm takes me, my thoughts intertwine with my emotions and the warmth manifests itself in a song, coming from deep inside me.


From me to you; bread.


To S, Alex, Greg, Thodori and Ektora.


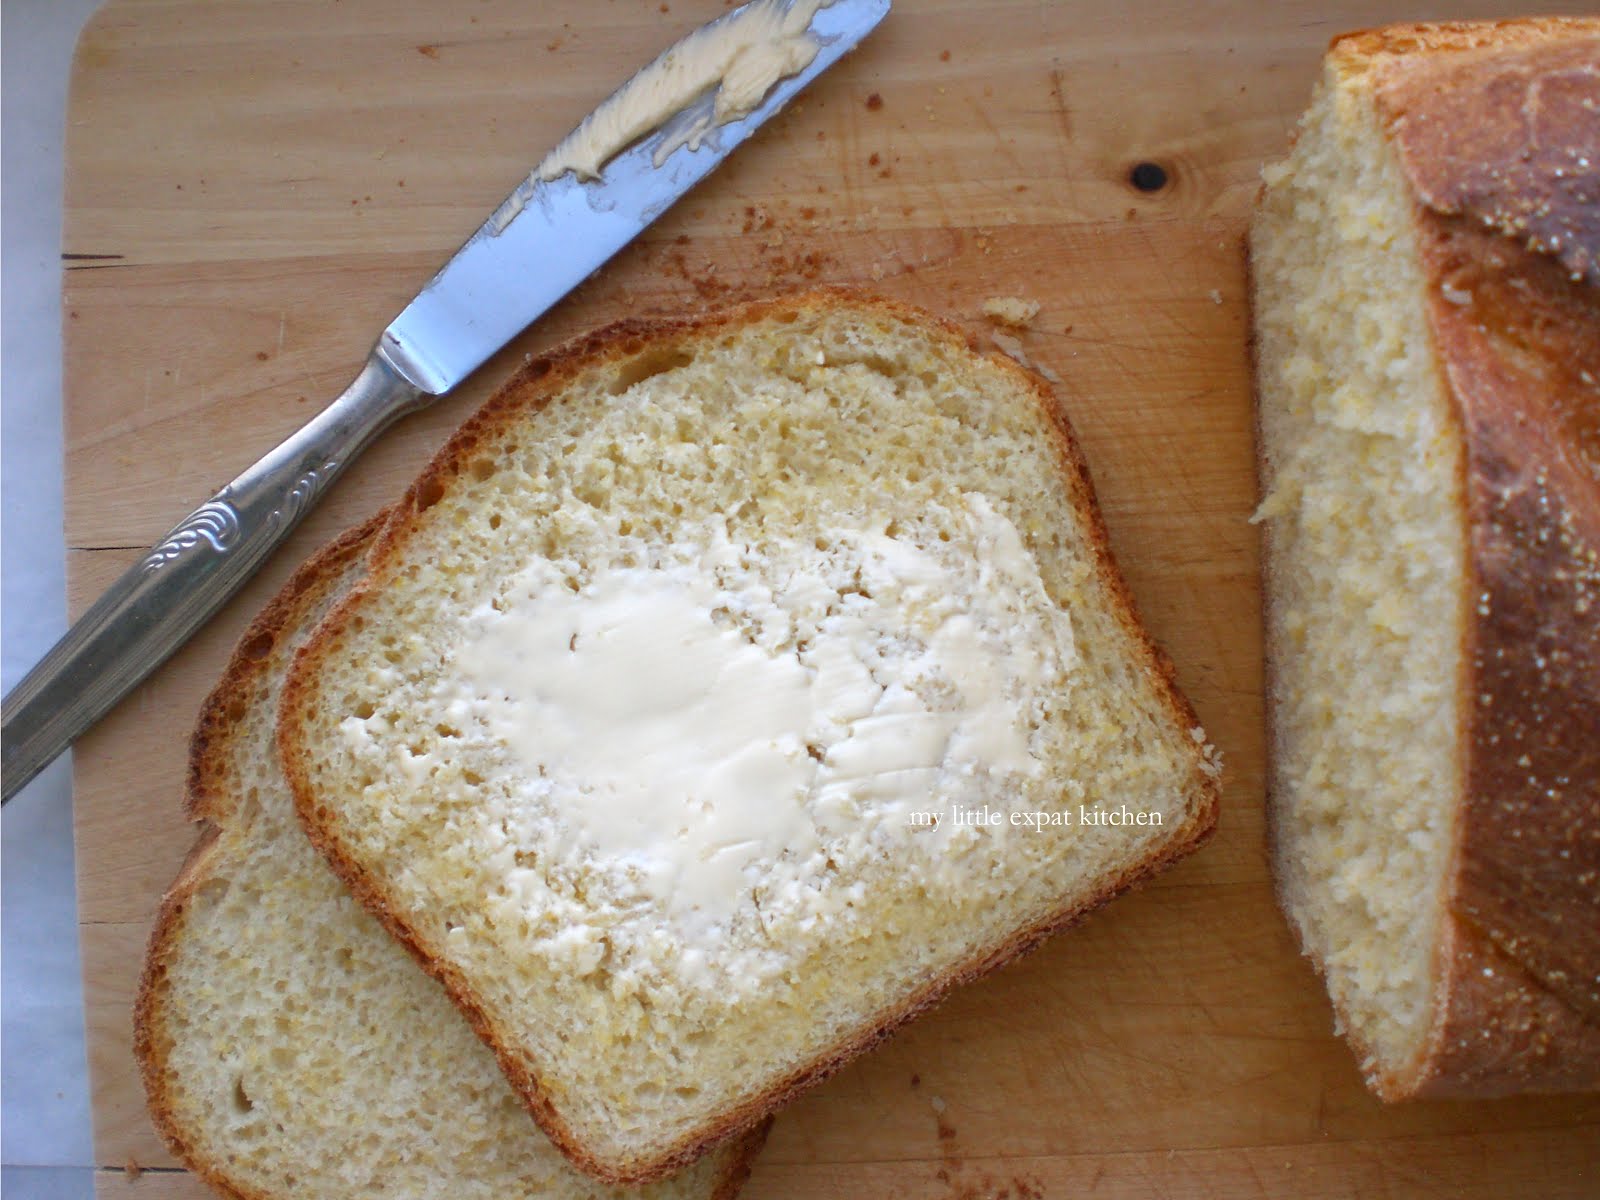
Dutch Corn Bread - Maisbrood

This bread is crusty on the outside and soft and springy on the inside. It has a subtle corn flavor and a little sweetness to it and the cornmeal grains give a gentle crunchiness to the crumb.

You may remember seeing it in this post featuring a savory French toast with poached eggs for which it is ideal, but it is also perfect for a sweet French toast, for a sandwich, to spread some homemade cashew butter on it, or to accompany any kind of juicy dish with lots of sauce that needs gathering up.

I invariably use a bread pan to bake the corn bread in, but you can certainly bake it free form, placing it straight onto a baking tray lined with baking paper. You can also bake it on a pizza stone, if you have one.

Not all flours were created equal so you may need a little more or less than the amount indicated in the recipe. Keep in mind that you can always add more flour but you can't take it out.
Also, it's best if the dough is a tad wet rather than it being stiff and hard.

You can either knead the dough in a stand mixer or with your hands. Below, I'm including instructions for both.


Yield: 1 large loaf, around 1.2 kg

Ingredients
60 g coarse cornmeal (or polenta) plus extra to sprinkle over the loaf
30 g demerara sugar (cane sugar)
7 g instant or active dry yeast
250 ml lukewarm whole milk plus extra to brush over the loaf
250 ml lukewarm water
15 g fine sea salt
700 g all purpose flour

olive oil for brushing bowl and bread pan

Special equipment: electric stand mixer (optional), bread pan 11 x 27 cm and 9 cm deep (optional), plastic wrap


Preparation
In the bowl of your stand mixer or in a large bowl, add the cornmeal, the demerara sugar, the yeast and the lukewarm milk and water. Mix with a fork and let stand for 5 minutes until the mixture is frothy.

Add the flour and the salt and if you're using a stand mixer, attach the dough hook and knead for about 10 minutes, on the lowest speed, until the dough no longer sticks to the sides of the bowl, and it is elastic.

Note: if you're kneading the dough by hand, you will definitely have to knead it for more than 10 minutes, about 15 minutes until it becomes smooth and elastic.

Yes, that's all perfect when you read it huh? But sometimes, when you're actually making the dough yourself, either by hand or in a mixer, you see a big mess of sticky dough and you wonder what the heck the person who wrote the recipe was thinking. Well, it has happened to me numerous times. Here's the deal, at least for this type of bread.
If the dough is sticking too much, all around the bowl, then you definitely need to add more flour. A little at a time.
If it is sticking just a little bit, then it's ok. Remove the dough from the bowl and knead by hand to check the consistency. If it is sticking to your hands a lot and you see that you can't form it into a ball, add a little flour.
If it sticks a little to your hands but you can form it into a ball, then it's ok.


So, form the dough into a ball and place it back on the bowl of your stand mixer, or in another large bowl, that you have oiled all around with olive oil so that the dough won't stick as it proofs.
Cover the bowl with plastic wrap and leave it in a warm place in your kitchen or anywhere around your house where it is not drafty. I always place it on the stovetop while the oven below is preheated, or right in front of it, on a chair.
The dough will need approximately 45 minutes to 1 hour to proof and double in volume.

Why cover the bowl with plastic wrap and not a kitchen towel? Because the plastic wrap prevents a crust from forming on the dough as it proofs.

In the meantime, brush with olive oil the bottom and sides of the bread pan, if you're using, and sprinkle with a little flour. Tap out excess flour.

Empty the dough onto a clean, lightly floured work surface and beat the air out of it. Knead for 1 minute, shape the dough into a rectangle, similar to the size of the bread pan, and place it in the pan.
If you're using a baking sheet, line it with baking paper, dusted with a little flour or cornmeal, and place the dough (shaped into a ball) on top.

Cover the dough with plastic wrap and leave it to proof in a warm place until it almost doubles in size.


Preheat your oven to 200 degrees Celsius.

Brush the top of the dough with a little milk and sprinkle with some cornmeal. Take a very sharp knife and slash the dough at an angle to 3-4 places. Place the bread pan (or baking sheet) on the middle rack of the oven and bake the bread for 30 minutes. Then lower the heat to 185 degrees Celsius and bake for further 5-10 minutes, until it is golden-brown on top.
It's a general rule that a bread loaf is ready when it makes a hollow sound when tapped on the bottom.

Take it out of the oven and leave it in the pan to cool for 10 minutes. Then take it out of the pan and if you're patient enough, let it cool completely on a rack.

Enjoy with some butter, or whatever your heart desires.