Tampilkan postingan dengan label nuts. Tampilkan semua postingan

Sabtu, 23 Februari 2013

I made a cake

Sometimes I have nothing more to say than “Here, I made a cake. You can make it too and I hope you enjoy it as much as we did”.


That would be cool. Many people do just that, they don’t write long blog posts to accompany their recipes. I, on the other hand, enjoy writing so when I find myself struggling for words, I don’t like it.


So in the spirit of not beating myself too much about it, I’ll just keep it short and sweet. This is an everyday cake; don’t you hate that term by the way, “everyday cake”? It implies it’s not special but I think it is, it’s quite delicious actually and that’s what matters.


It has the combination of flavors that I once dreaded (before this ice cream changed my mind), banana and chocolate, and there are some ground hazelnuts in there that give it a slightly crunchy mouth-feel. A sprinkling of demerara sugar on top makes it playfully crispy and did I mention the chocolate is milk chocolate? Yes, and let me tell you, that’s a very good thing.


I haven’t used milk chocolate in ages, ever since I made this ice cream, but it’s so perfect in this cake, it really complements the rest of the ingredients well, and as it oozes out of a warm piece, it’s extremely tempting.


The crumb is dense and moist and the aroma of the banana will drive you crazy before the cake cools down enough to eat. You don’t have to eat it right then and there though, because the next day it’ll taste infinitely better as the flavors would’ve had the chance to develop.


I served it with crème fraîche sprinkled with a whiff of cinnamon and it was delightful, but a straight-up piece, along with a hot cup of coffee, will make the best breakfast ever.

It did this morning.


P.S. I believe that the two references to ice cream make it clear that I have summer on my mind. Dutch winters can have that effect on me.

P.P.S. As you know, I much prefer to express myself through music rather than words, so I'll leave you with this song that I'm listening to all day today. Join me.


Banana Cake with Ground Hazelnuts and Milk Chocolate Chunks
Adapted from Nigel Slater

This is a substantial cake that fills you up and makes you rub your belly with contentment. Consider yourselves warned.


Yield: 1 cake / 8-10 pieces

Ingredients
180 g unsalted butter, softened, plus extra for greasing the pan
90 g caster sugar
90 g soft light brown sugar
80 g blanched unsalted hazelnuts
2 large eggs
½ tsp pure vanilla extract
180 g all-purpose flour
1 tsp baking powder
2 medium-sized (about 300 g), very ripe (almost black) bananas, peeled and roughly cut into pieces
180 g good quality milk chocolate (or dark chocolate 55% cocoa solids if you want), cut into small chunks
1-2 Tbsp demerara sugar

Crème fraîche, for serving (optional)
Ground cinnamon, for serving (optional)

Special equipment: stand or hand-held mixer, small food processor, loaf pan (23 x 9 x 8 cm), baking paper


Preparation
In a small skillet or sauté pan add the blanched hazelnuts and place over a medium heat. Toast the nuts, stirring often so they don’t get burned, until they become fragrant and brown lightly. Transfer them to your food processor and allow them to cool. Then grind them, being careful not to grind them too finely otherwise they’ll start releasing their natural oils and become pasty. You don’t want that.

Add them to a medium-sized bowl along with the flour and baking powder and mix with a spatula.

Preheat your oven to 170 degrees Celsius / 325 Fahrenheit.
Butter the bottom and sides of your loaf pan with butter and line it with baking paper.


In the bowl of your stand mixer (or in a large bowl), add the softened butter and the caster and soft light brown sugar and using the paddle attachment (or your hand-held mixer), beat on medium-high speed for about 5 minutes or until you have a creamy and light-colored mixture. Add the eggs one at a time, beating well after each addition and then add the vanilla extract. Beat for 10 seconds and then add the ground hazelnuts-flour mixture to the bowl. Beat on low speed until just combined and you don’t see any white patches of flour. Fold in the chocolate chunks and the banana pieces. The resulting batter will be slightly thick.

Empty the cake batter into your prepared loaf pan, straighten the top with a spatula or the back of a spoon and sprinkle the top with the demerara sugar.


Place the pan on the low rack of your oven and bake for 30 minutes. Then transfer it to the middle rack of the oven and bake for a further 35-45 minutes or until a cake tester or toothpick inserted in the middle of the cake comes out clean. If the top of the cake darkens too quickly while baking, cover it lightly with aluminum foil.

Once ready, take the pan out of the oven and place it on a wire rack until the cake cools. Then remove it from the pan and allow it to cool completely on the rack.

Cut it into pieces and serve it, with some crème fraîche and a sprinkling of cinnamon if you want.

You can keep it at room temperature, covered, for 4-5 days. It will taste better as the days pass.


Sabtu, 09 Februari 2013

A sweet puff pastry tart

When you decide to make your own French puff pastry and you have that gorgeous dough sitting in your fridge, you don’t just stop at a tyropita (Greek cheese pie) but you think of something else to make as well. Something sweet this time.


My recipe for puff pastry yields quite a lot so whenever I make it, which is every couple of months or so, I always come up with a different version of what you see here, a puff pastry tart. During spring and summer it’s made with lots of different colorful fruits and during winter it’s made invariably with a little or, a lot of chocolate.


This version has all the good things gathered into one. Puff pastry, mascarpone, vanilla, chocolate, hazelnut praline.


The puff pastry is a miracle all on its own, especially when it’s made with your own two hands; the buttery, flaky and slightly caramelized dough begs to be bitten into. The mascarpone, sweetened by icing sugar and flavored with vanilla, is creamy and smooth, and the praline, that crunchy hazelnut-caramel concoction, is simply divine.


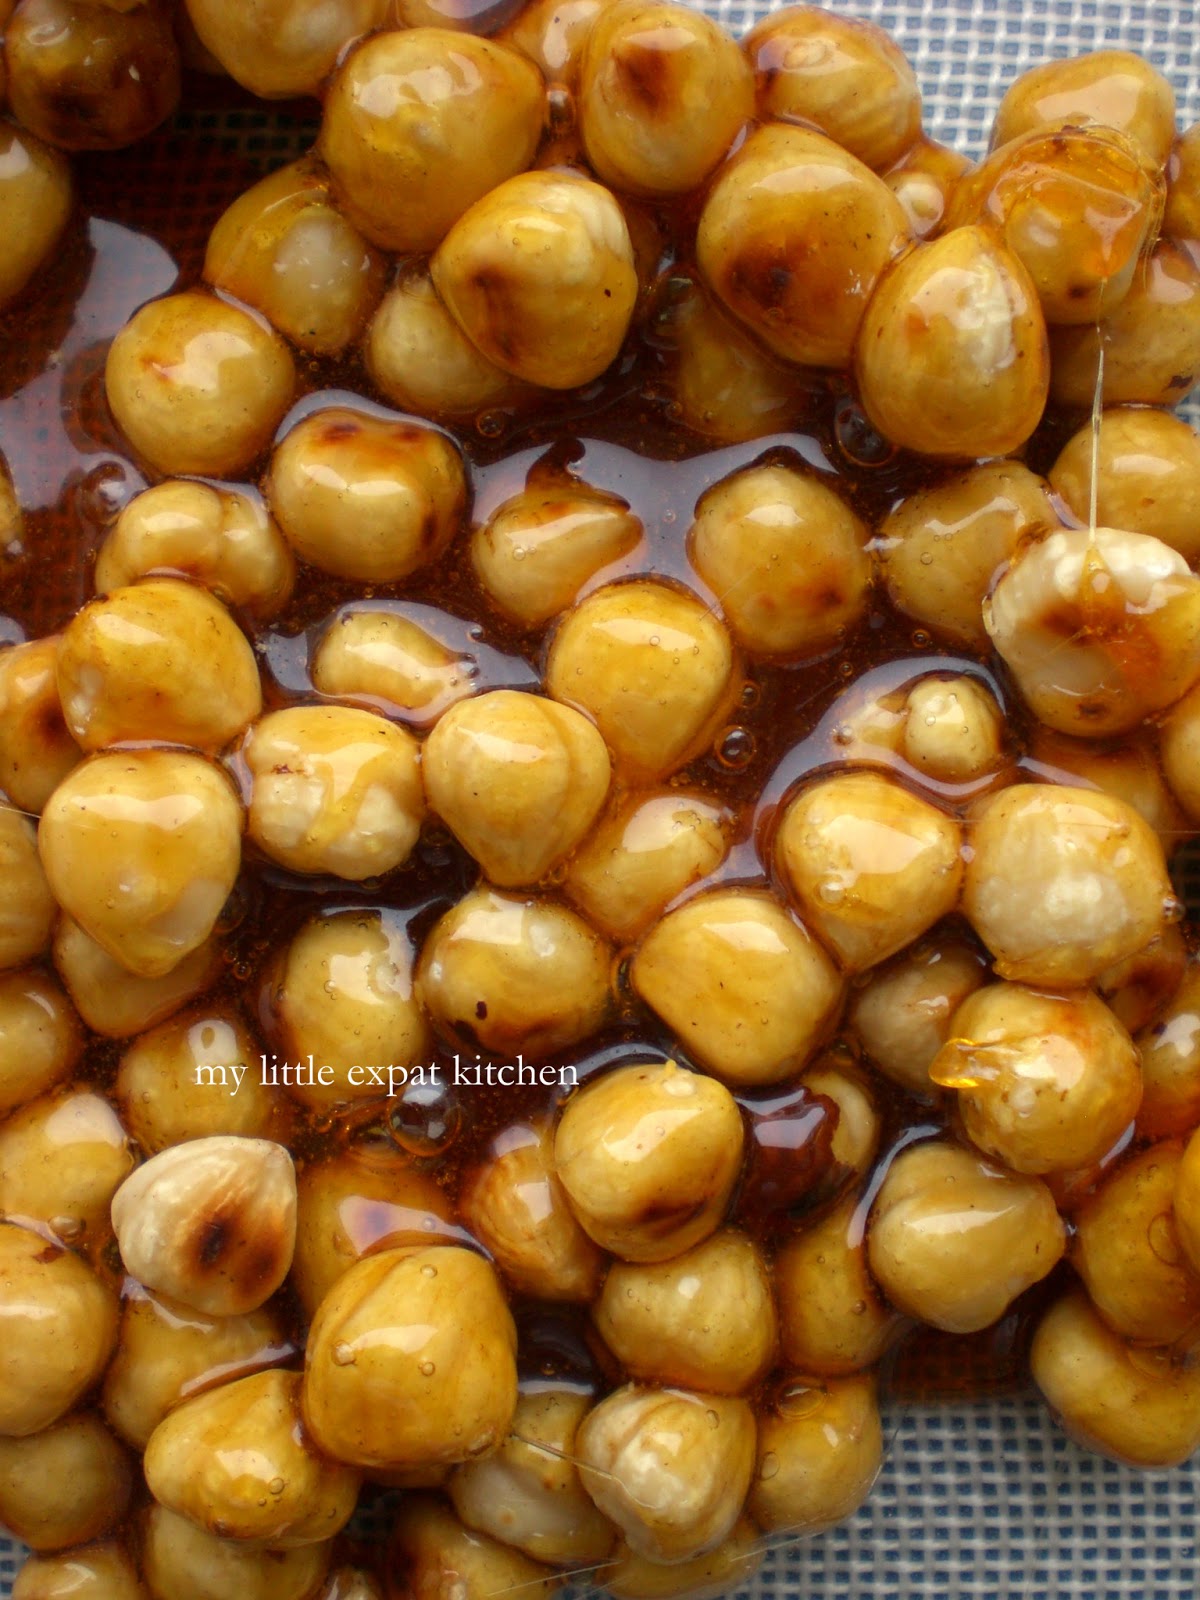
Praline is another little miracle of the pastry arts. It all starts with a simple caramel to which you add toasted or roasted hazelnuts (or almonds if you’re making almond praline). You stir everything around to coat each little nut with the golden-colored caramel and then spread it on a baking sheet. Once cooled and set, it goes in the food processor and from then on, three glorious things can come of it.


You can make a crushed hazelnut praline with small, visible pieces of hazelnut and caramel, a praline powder, or a praline paste. All three are full of flavor and texture and are so incredibly versatile that you can use them in or on cakes, tortes, ice creams, frankly any dessert can benefit from a little hazelnut praline.


But back to this tart which, incidentally, disappeared in a matter of minutes. It came as no surprise to me since who can possibly resist a crisped puff pastry filled with a sweet, billowy mascarpone cream, speckled with hundreds of diminutive vanilla seeds, a crunchy praline and piped dark chocolate? Well, no one.


Puff Pastry Tart with Vanilla Mascarpone, Crushed Hazelnut Praline and Melted Chocolate

I egg-washed and sprinkled the dough with caster sugar before baking it in order to primarily sweeten it, but to also caramelize it a bit, hence the dark color. Keep a close eye on it while baking though since the sugar tends to burn easily and gives off a bitter taste. I also made lots and lots of small holes in the raw dough because I didn’t want it to puff up like crazy.

As with the tyropita, I used homemade French puff pastry but you can certainly use store-bought, just make sure it’s made with butter. Whichever kind of puff pastry you use, make sure to thaw it properly. Remove it from the freezer and place it in the fridge 24 hours before using it.


Yield: 6 servings

Ingredients
350 g homemade puff pastry or 1 sheet of ready-made puff pastry
1 small egg, lightly beaten with a fork
2 Tbsp caster sugar
300 g mascarpone
1 vanilla bean, cut in half lengthwise and deseeded or 1 tsp vanilla bean paste
30 g icing sugar
Hazelnut praline (see recipe below)
70 g good quality dark chocolate 60% cocoa solids, cut into small pieces

Icing sugar, for dusting the tart

Special equipment: rolling pin (to roll out homemade puff pastry), baking paper, baking sheet, plastic wrap, pastry brush, hand-held mixer


Preparation
If you’re using homemade puff pastry, dust a clean work surface and the top of the dough with a little flour and using a rolling pin, roll it out into an approximately 25 x 30 cm rectangle with a thickness of 0.3-0.4 cm. The thickness of the puff pastry is important because it determines the baking time. Trim off the edges of the dough, lightly score with a knife a frame and prick the dough inside that frame all over with a fork. This will prevent it from rising too much. Place the rolled out dough onto a piece of baking paper and onto your baking sheet. Cover with plastic wrap and place it in the refrigerator.

Preheat your oven 185-190 degrees Celsius / 365-375 Fahrenheit.

Take the baking sheet out of the fridge, brush the dough with some of the beaten egg and sprinkle it with the sugar. Place the baking sheet straight in the preheated oven, on the low rack, and bake the puff pastry for 10 minutes. Then transfer it to the middle rack and bake for 15-20 minutes, until it has puffed and taken on a golden-brown color and the sugar has caramelized on top. Be careful not to burn it.

In the meantime, in a medium-sized bowl, add the mascarpone, scraped vanilla seeds or paste and the icing sugar and beat with a hand-held mixer until you have a creamy and smooth mixture.

Remove the puff pastry from the oven and allow it to cool.


Melt the chocolate in a bain-marie or in the microwave for a couple of minutes at 600 watts (I don’t usually melt chocolate in the microwave but for this small amount of chocolate it’s not worth the trouble of a bain-marie) and pour it into a cornet (paper cone) (you can watch this video on how to make one yourself).

Once the puff pastry has cooled, sprinkle it all over the top with some icing sugar and using a small offset spatula, cover it with the vanilla mascarpone. Sprinkle with lots of crushed hazelnut praline and pipe the melted chocolate on top to create a stripe pattern.

Serve your tart immediately cut into pieces.


Hazelnut Praline

As mentioned in the main body of the post, hazelnut praline can be processed to a chunky consistency, to a powder, or a paste, and it’s one of those useful and interesting recipes to have in your arsenal. And it’s very easy to make as well.

I used blanched hazelnuts but you can also use hazelnuts with skin. You’ll need to roast them on a baking sheet for about 10 minutes in a 175 degrees Celsius / 350 Fahrenheit preheated oven, checking them regularly and being careful not to burn them. Remove them from the oven and place them on a clean kitchen towel. Once cool, rub them while still inside the towel to remove their skins and use according to the recipe below.


Yield: about 250 g

Ingredients
130 g blanched unsalted hazelnuts
150 g caster sugar
60 ml water

Special equipment: baking sheet, baking paper or silicone sheet, candy thermometer (optional), small food processor


Preparation
In a small skillet or sauté pan add the blanched hazelnuts and place over a medium heat. Toast the nuts, stirring often so they don’t get burned, until they become fragrant and brown lightly. Transfer them to a small bowl.

Line your baking sheet with baking paper or a silicone sheet.

In a medium-sized, heavy-bottomed saucepan, add the sugar and water and place over a medium heat. Stir with a heatproof spatula until the sugar dissolves in the water, turn heat up to medium-high and then allow the magic to happen. The sugar will start to boil, do not stir at all because it will crystallize and it will be ruined, but stay close and keep an eye on it because you don’t want your caramel to burn. It will take about 7 minutes for the sugar to turn into a dark golden caramel. The smell of burnt sugar is an indication that it’s ready. If you have a candy thermometer it should read 187 degrees Celsius / 370 Fahrenheit.


Take the pan off the heat immediately and add the toasted hazelnuts to the pan. Stir briefly with a heatproof spatula to coat them with the caramel and empty everything onto the prepared baking sheet, spreading it quickly with the help of the spatula. Allow to cool completely. It will take 25-30 minutes.


Once cooled, break the praline with your hands into pieces and add them to your food processor. Grind the praline and empty it into a glass jar.

Use part of it on your puff pastry tart and you can keep the rest in the refrigerator, in a sealed glass jar, for 1 week.


Selasa, 15 Januari 2013

A beginning

I wasn’t planning on posting anything today, I was preparing another post, one I have been working on for a couple of weeks now, but I felt I had to stop and write about these cookies instead.


It all started yesterday, when the large flakes of snow began to fall. Big, huge flakes like cotton balls falling from the sky. As I was walking the streets of the city, the scenery was transforming before my very eyes, and it was nothing short of magical.


Today, when I woke up, I realized that the snow had been falling all night long. I looked outside and everything was covered with a white blanket, everything looked peaceful and you couldn’t hear a thing. Total silence.


I had the uncontrollable urge to make cookies. With salted butter. And cocoa nibs. And ground pistachios. And soft light brown sugar. And crème fraîche. And vanilla. And it was my own concoction. A dream I had. And it worked. And they were beautiful, like only something with rough edges can be, and chewy, and flavorful, not of the overly sweet kind but of the mildly sweet and slightly acidic and bitter and nutty and buttery kind, and they were warm and comforting, like only homemade things can be.


I missed you, friends. I’m glad I’m back.


Salted Butter, Cocoa Nib and Pistachio Cookies

Cocoa or cacao nibs are pure cocoa beans. Let’s take it from the top though. Cocoa trees are native to the Amazon and certain areas of South and Central America and the fruit of these trees are the cocoa pods. Cocoa pods are harvested and opened to expose the beans that are fermented, dried, crushed, processed and manufactured into every type of chocolate and cocoa you can imagine. In factories, the cocoa beans are cracked and their shell is removed; the cracked bits of the cocoa bean are the cocoa nibs. These can be raw or roasted, depending on whether or not the cocoa bean has been roasted before cracking.

Cocoa nibs are a super-food; they are full of antioxidants, magnesium and vitamin C among others, and can be eaten as a snack or incorporated into baked goods. They are bitter and slightly acidic in flavor—they’re not at all sweet—and have a very crunchy texture. Granted, they’re an acquired taste, at least for me, and as with everything else, their flavor is hugely dependent on their quality.

You’ll find them in health food stores and there’s no actual substitute for them. What you can do is add dark chocolate chips instead, just to keep things interesting (the higher percentage of cocoa solids the better, 85% is best).


Yield: about 20 cookies

Ingredients
125 g salted butter, cut into small pieces, at room temperature (if you don't have salted butter, substitute with unsalted butter + 1/8 tsp salt)
125 g soft light brown sugar
1 tsp vanilla bean paste or pure vanilla extract
2 Tbsp crème fraîche
125 g all-purpose flour, sieved
1 tsp baking powder, sieved
125 g unsalted, shelled pistachios
50 g raw cocoa nibs

Granulated sugar, for sprinkling

Special equipment: small food processor, stand or hand-held mixer, fine sieve, baking sheet(s)


Preparation
Grind the pistachios in a food processor, being careful not to grind them too finely otherwise they’ll start releasing their natural oils and become pasty. You don’t want that. Add them to a medium-sized bowl, along with the flour, baking powder and cocoa nibs. Mix well with a spoon.


In the bowl of your stand mixer (or in a large bowl), add the butter and soft light brown sugar and beat, using the paddle attachment (or with your hand-held mixer), on medium-high speed for about 6 minutes or until you have a creamy and light mixture. Add the vanilla and crème fraîche and beat to incorporate. Add the flour-pistachio-cocoa nib mixture and beat on low speed. After a minute it will come together and gather in pieces around the paddle attachment (or around the beaters) of your mixer.


Remove the dough from the bowl and shape it into a ball. At this point you'll see the actual texture of the dough which should be a little sticky, smooth and pliable. Wrap it with plastic wrap and place it in the refrigerator for 1 hour.

Line your baking sheet with baking paper.
Preheat your oven to 180 degrees Celsius / 350 Fahrenheit.

Remove the dough from the fridge and unwrap it. Take a piece of dough and roll it between your hands to make a walnut-sized ball and place it on the lined baking sheet. Continue with the rest of the dough, spacing the balls 3 cm apart because they’ll spread while baking.


Place the baking sheet on the middle rack of the oven and bake the cookies for 12-14 minutes, rotating the baking sheet halfway through, until the cookies take on a golden color and remain soft in the middle.
Remove the baking sheet from the oven and sprinkle them with a little granulated sugar. Allow the cookies to cool a bit on the baking sheet and then transfer them to a wire rack to cool completely.

You can keep cookies for 1 week at room temperature, in a tightly closed cookie tin.


Jumat, 28 Desember 2012

The meatloaf

For those of us who are home cooks and crazy about food, it's hard to find like-minded people who share our culinary obsessions.


Whenever I have conversations with friends and acquaintances regarding food, after a while they get bored. They look at me as if I'm talking about stamps whereas I can go on and on about the importance of spices in a good Greek stew for hours.


But when I come here to write or when I visit friends' blogs, I feel at home because I know that we share the same passion; we showcase our dishes, record our thoughts and ideas about food, in the hope that there will be others out there who'll be interested in what we have to say.


Based on that passion, I always get overly excited about the prospect of sharing with you a dish that surprised me with its unique taste, a dish that I immensely enjoyed and that I know you'll love as well.


This is such a dish. It has a Middle Eastern flair and its impressive and beautiful presentation is perfect for these festive days. I never expected to love it since I've never been a fan of meatloaves but let me tell you, I enjoy being proved wrong on such matters.


It is a meatloaf stuffed with quail eggs, dried apricots and walnuts but it doesn't stop there. There's spices and sun-dried tomatoes and fresh mint and all those flavors that titillate the taste buds and make you want to eat more and more and more.


It is served with a sweet tomato sauce with saffron, ginger and long sweet red pepper that is absolutely delicious. This sauce was a revelation. When I tasted it, I imagined all sorts of dishes it could work with—spaghetti, Greek meat patties, a big juicy steak,—my imagination ran wild. It's a slightly spicy sauce with heat coming from the ginger, sweet notes from the sweet pepper and a little sourness from the tomato that complements perfectly the earthy, complex, umami flavor of the meatloaf.


It's the ideal dish to serve for a celebratory dinner, a New Year's feast, or even your Sunday dinner. Make it, share it with the ones you love and enjoy it!


Stuffed Meatloaf with Quail Eggs, Dried Apricots and Walnuts
Slightly adapted from Dutch Delicious

This meatloaf is cooked inside a loaf pan which not only helps hold its shape but also cook uniformly.

If you can't find quail eggs, simply omit them from the recipe. Don't substitute with chicken eggs because they're too large.

You can prepare the meatloaf one or two days in advance, keep it in the refrigerator and bake it on the day you want to serve it.

If you want to make sure your meatloaf is seasoned well before you get it into the loaf pan, you can make a tiny patty with the mixture and cook it in a frying pan. This way you'll know the result will be perfect and you won't run the risk of serving under-seasoned food to your guests.


Yield: 6 servings

Ingredients
200 g dried apricots
12 quail eggs
2 Tbsp olive oil plus extra for greasing the pan
1 onion, finely chopped
3 garlic cloves, finely chopped
5 sun-dried tomatoes, finely chopped
500 g minced beef or veal
2 tsp dried mint
2 tsp ground coriander
1 tsp ground cinnamon
2 medium-sized eggs
45 g dried breadcrumbs
100 g walnuts (50 g finely chopped, 50 g whole)
1 tsp salt
¼ tsp freshly ground black pepper

Fresh mint leaves, to garnish

Special equipment: loaf pan (23 x 9 x 8 cm) (1½-2 liters capacity), aluminum foil


Preparation
Place the dried apricots in a medium-sized bowl and add enough warm water to cover them completely. Leave to soak for 15 minutes and then drain them. Take half of the apricots and chop them finely, they will be added later to the meatloaf. The other half of the apricots will be added whole, on top of the meatloaf.

In the meantime, add the quail eggs to a small pan and add enough cold water to cover them completely. Boil the eggs for 7 minutes, then rinse under cold running water and peel them. You need to be careful when peeling them because you don't want to break the eggs up. The shell of quail eggs is thin and a little difficult to peel. The secret is in making sure to peel away the inner membrane of the egg together with the shell, otherwise the egg will break up.

While the apricots are soaking and the eggs are boiling, add the olive oil to a medium-sized frying pan and heat over medium-high heat. Once it starts to shimmer, lower heat to medium-low, add the onion, garlic and sun-dried tomatoes and sauté for 3-5 minutes until they soften but don't brown.
Empty everything into a large bowl, scraping well the frying pan, and allow to cool. Then add to the bowl the minced beef or veal, the dried mint, the ground coriander and cinnamon, the 2 eggs, the dried breadcrumbs, 50 g finely chopped walnuts, the finely chopped apricots, salt and pepper and mix well with your hands until all the ingredients are well blended.


Preheat your oven to 180 degrees Celsius / 350 Fahrenheit.

Take the loaf pan and grease the inside all over with olive oil. Then line the bottom and the sides with aluminum foil, leaving an overhang on all sides. I use two pieces of foil; one to cover the pan lengthwise and another one to cover it widthwise. Make sure your foil doesn't have any holes otherwise juices will run through and the meatloaf will stick to the pan making it difficult to remove.

Take one-third of the meatloaf mixture and spread it evenly at the bottom of the pan. Take 6 quail eggs and divide them on top of the meatloaf mixture and then add the next one-third of the mixture on top, being careful to press it firmly so it's nice and tight (be careful not to squash the eggs though). Then divide the rest of the quail eggs over the top and add the rest of the meatloaf mixture. Press it well, making sure you have an even top. Cover the top of the meatloaf with the whole apricots and walnuts and then cover with the overhanging foil.
At this point, you can place the meatloaf in the fridge and keep it for one-two days. Take it out of the fridge at least 1 hour before baking it, so it can come to room temperature.


Place the loaf pan on the middle rack of the oven and bake the meatloaf, covered with the foil, for 50 minutes. Then uncover the top of the meatloaf and bake for 10 more minutes.
Take the pan out of the oven and allow the meatloaf to cool for 5 minutes. Then, remove the meatloaf from the pan carefully by pulling it out by the overhanging foil. Allow to cool for 5 minutes and then remove the foil from the meatloaf carefully so it doesn't break. Transfer the meatloaf to a platter and garnish with some fresh mint leaves.

Serve, cut into slices, with the sweet tomato sauce.


Sweet Tomato Sauce with Ginger and Saffron
Slightly adapted from Dutch Delicious

As with the meatloaf, this sauce can be made one to two days in advance and be kept in the fridge. Just reheat it before serving.


Yield: about 400 ml / 6-8 servings

Ingredients
Pinch of saffron threads
100 ml dry white wine
3 Tbsp olive oil
1 onion, finely chopped
2 garlic cloves, mashed
3 cm piece of fresh ginger, peeled and grated
1 long sweet red pepper, deseeded and finely chopped
1 tsp ground cinnamon
1 Tbsp runny honey
400 g canned whole peeled tomatoes
Salt
Freshly ground black pepper

Fresh mint leaves, to garnish

Special equipment: immersion blender or regular blender or food processor


Preparation
Add the saffron threads to a small bowl and pour over the wine. Allow the saffron to soak for 5 minutes.

In a medium-sized saucepan, add the olive oil and heat over medium-high heat. When the oil starts to shimmer, turn heat down to medium-low, add the onion, garlic and ginger and sauté for 3-5 minutes until they soften. Then add the red pepper, the cinnamon and the honey and cook for 1 minute, stirring continuously. Add the wine with the saffron and the canned whole tomatoes and crush them with a wooden spoon. Season with salt and pepper, bring the sauce to the boil and turn heat down to low. Simmer for 15 minutes with the lid on.


When the sauce is ready, use an immersion blender to blend the sauce directly in the pan until you have a smooth sauce. If you don't have an immersion blender, transfer the sauce to a regular blender or food processor and process there.

At this point, you can refrigerate the sauce for up to two days and reheat it when you want to serve it.

Garnish the sauce with fresh mint leaves and serve with the meatloaf.