There are some fruits that have an instant allure, a certain something that attracts your senses either by the way they smell, the way they look or even by the way they feel when you touch them. Strawberries, cherries and persimmons are such fruit.

And then there are other fruits, the "ugly" ones, those that don't have much going for them at first glance. You need to get to know them in order to appreciate what they can really do for you or for one of your dishes. Such fruits are quinces.

Unassuming, rather unappealing fruit that can become so much more just by adding some sugar to them and boiling them, thus creating the amazing quince paste, or by sautéing them in lots of butter to accompany a steak, or caramelizing them and serving them with a winter ice cream. But where they actually shine is in dishes like this one, a traditional Greek island dish called Sofigado.

This dish comes from the beautiful, green island of Lefkada located in the Ionian Sea, off the west coast of Greece. Sofigado is a rich, sweet and sour beef stew with quinces and petimezi (grape-must syrup) and its history, much like Pastitsada's, is rooted in the times of Venetian occupation.

It's a pretty straightforward winter stew but with extraordinary flavors and some unique ingredients. As it always happens in Greek cooking, it all starts with olive oil and onions. Lots of onions which, after the meat has been browned in the oil, are sautéed until soft and translucent. Then the meat goes back in the pan and garlic, tomato paste, red wine vinegar and fresh rosemary are introduced to the mix.

The beef is stewed until succulent and then the quinces are added, as well as the petimezi. I have my friend Kiki to thank for a bottle of fresh petimezi that she sent me a couple of months ago (as she did last year, which back then gave me the chance to make Greek moustokouloura cookies). Thanks Kiki!

After twenty minutes or so, when the quinces have softened but still retain their crunch, when the petimezi has permeated the meat and a rich sauce has been created, the stew is ready. Ready to be savored. You'll rarely find such a combination of sweet and sour flavors in traditional Greek cooking, especially when it comes to beef dishes.

The experience of tasting Sofigado resembles that of a rollercoaster. The sweet flavor of the petimezi and quince, reminiscent of the spoon sweets that Greek grandmothers make, hits you first and then the sourness of the fruit becomes the prominent flavor. The umami-ness of the meat comes to balance out all the flavors and the ride goes on and on until you suddenly end up with an empty plate, asking for more.

Sofigado Lefkaditiko (Greek Beef Stew with Quinces and Grape-Must Syrup from Lefkada)
Sofigado can be enjoyed by the whole family as an everyday meal but is also elegant enough to become part of a festive holiday meal or a dinner party.
You can accompany it with rice or mashed potatoes for a festive or special meal, and with French fries or a big green salad for an everyday meal.
You can either use beef or veal in this dish.
For those of you living in The Netherlands, the meat you should use is runderriblap.
In traditional Greek cuisine, onions are usually grated in a box grater rather than chopped. This gives a different texture to the resulting sauces, making them thicker and richer. If you can't bother grating the onions in this recipe, you can whiz them in the food processor until they are almost puréed.
The beauty of this dish is in its sweet and sour flavors and contrasting textures of tender, succulent beef in a rich sauce and juicy, soft yet firm quinces.
The more ripe and fragrant the quinces, the better they are for this dish. If they're not ripe, their taste will be too sour, but don't worry, you can rectify that by adding extra petimezi at the end.
You can find petimezi (grape-must syrup / grape molasses) in Greek or Middle Eastern stores.

Yield: 4-6 main-course servings
Ingredients
1 - 1.2 kg boneless beef stewing steak like chuck steak
120 ml good quality olive oil
2 medium-sized red onions (about 250 g), grated
40 ml red-wine vinegar
7 medium-sized garlic cloves, peeled
1 Tbsp tomato paste
Freshly ground black pepper
2 fresh sprigs of rosemary
Pinch of sugar
330-350 ml hot water
Salt
3 large quinces (1 - 1.1 kg), peeled and cut into wedges
100 ml petimezi (grape-must syrup / grape molasses)
Special equipment: pan or Dutch oven with a 5 - 5.5 liter capacity, box grater or food processor
Preparation
Take the meat and cut with a knife the large pieces of fat off, leaving a fair amount of fat on in order to flavor the dish. Cut the meat into pieces, about 6x6 cm each. Place them on paper towels and pat them dry. This is an important step because the meat will not brown properly if it's damp.
In a large, deep, heavy-bottomed pan or preferably in a Dutch oven, add the olive oil and heat over medium-high heat. When it starts to shimmer, add enough beef pieces to cover 2/3 of the bottom of the pan (do not overcrowd the pan because the beef will boil rather than brown) and brown the pieces on both sides. Remove pieces from the pan and place them in a bowl. Brown the rest of the beef pieces in the same manner and place them in the bowl.


Add the grated onions to the pan and sauté them on medium heat for about 4 minutes until they soften and become translucent. Return the browned beef pieces to the pan, along with the juices accumulated in the bowl you kept them in, and add the red-wine vinegar. Stir well with a spatula or spoon and add the garlic cloves, tomato paste, freshly ground black pepper, rosemary sprigs and a pinch of sugar and stir well. Add the hot water (hot so the cooking process won't stop) and stir well. Put the lid on and let it come to the boil. Then turn the heat down to the lowest setting and let the meat stew for 1 - 1 ½ hours or until it is tender (keep in mind though that it'll cook for a further 25 minutes when you add the quinces). Check the meat every 20 minutes or so, stirring it around a bit.
Then, remove the rosemary sprigs (the leaves would have fallen in the sauce) and add salt. The reason you're adding the salt now is because if you add it at the beginning of the cooking process, the beef will become tough and chewy. Add the quinces and the petimezi to the pan and stir well with a spatula or spoon. The quinces must be almost covered with liquid in order to cook, so if there's not enough liquid in your pan, add a bit of hot water. Put the lid back on and allow beef and quinces to simmer for about 25 minutes, stirring every now and then (not with a spatula or spoon, but by holding the pan by its handles and moving it around in circular motions so that everything gets stirred. You're doing that so that you don't break up the quinces. You don't want them to disintegrate into the sauce. They must remain in whole wedges and not become mushy).
Check the quinces after 15 minutes. It's good to taste them at this point and if they're too sour, you can add a little more petimezi to the pan.
You should end up with tender beef in a rich sauce and soft but not mushy quinces. They should hold their form and add texture to the dish.
Serve hot with your favorite accompaniment and make sure to have lots of bread on the table for dipping it in that delicious sauce.
Sofigado tastes even better the second day.


And then there are other fruits, the "ugly" ones, those that don't have much going for them at first glance. You need to get to know them in order to appreciate what they can really do for you or for one of your dishes. Such fruits are quinces.

Unassuming, rather unappealing fruit that can become so much more just by adding some sugar to them and boiling them, thus creating the amazing quince paste, or by sautéing them in lots of butter to accompany a steak, or caramelizing them and serving them with a winter ice cream. But where they actually shine is in dishes like this one, a traditional Greek island dish called Sofigado.

This dish comes from the beautiful, green island of Lefkada located in the Ionian Sea, off the west coast of Greece. Sofigado is a rich, sweet and sour beef stew with quinces and petimezi (grape-must syrup) and its history, much like Pastitsada's, is rooted in the times of Venetian occupation.

It's a pretty straightforward winter stew but with extraordinary flavors and some unique ingredients. As it always happens in Greek cooking, it all starts with olive oil and onions. Lots of onions which, after the meat has been browned in the oil, are sautéed until soft and translucent. Then the meat goes back in the pan and garlic, tomato paste, red wine vinegar and fresh rosemary are introduced to the mix.

The beef is stewed until succulent and then the quinces are added, as well as the petimezi. I have my friend Kiki to thank for a bottle of fresh petimezi that she sent me a couple of months ago (as she did last year, which back then gave me the chance to make Greek moustokouloura cookies). Thanks Kiki!

After twenty minutes or so, when the quinces have softened but still retain their crunch, when the petimezi has permeated the meat and a rich sauce has been created, the stew is ready. Ready to be savored. You'll rarely find such a combination of sweet and sour flavors in traditional Greek cooking, especially when it comes to beef dishes.
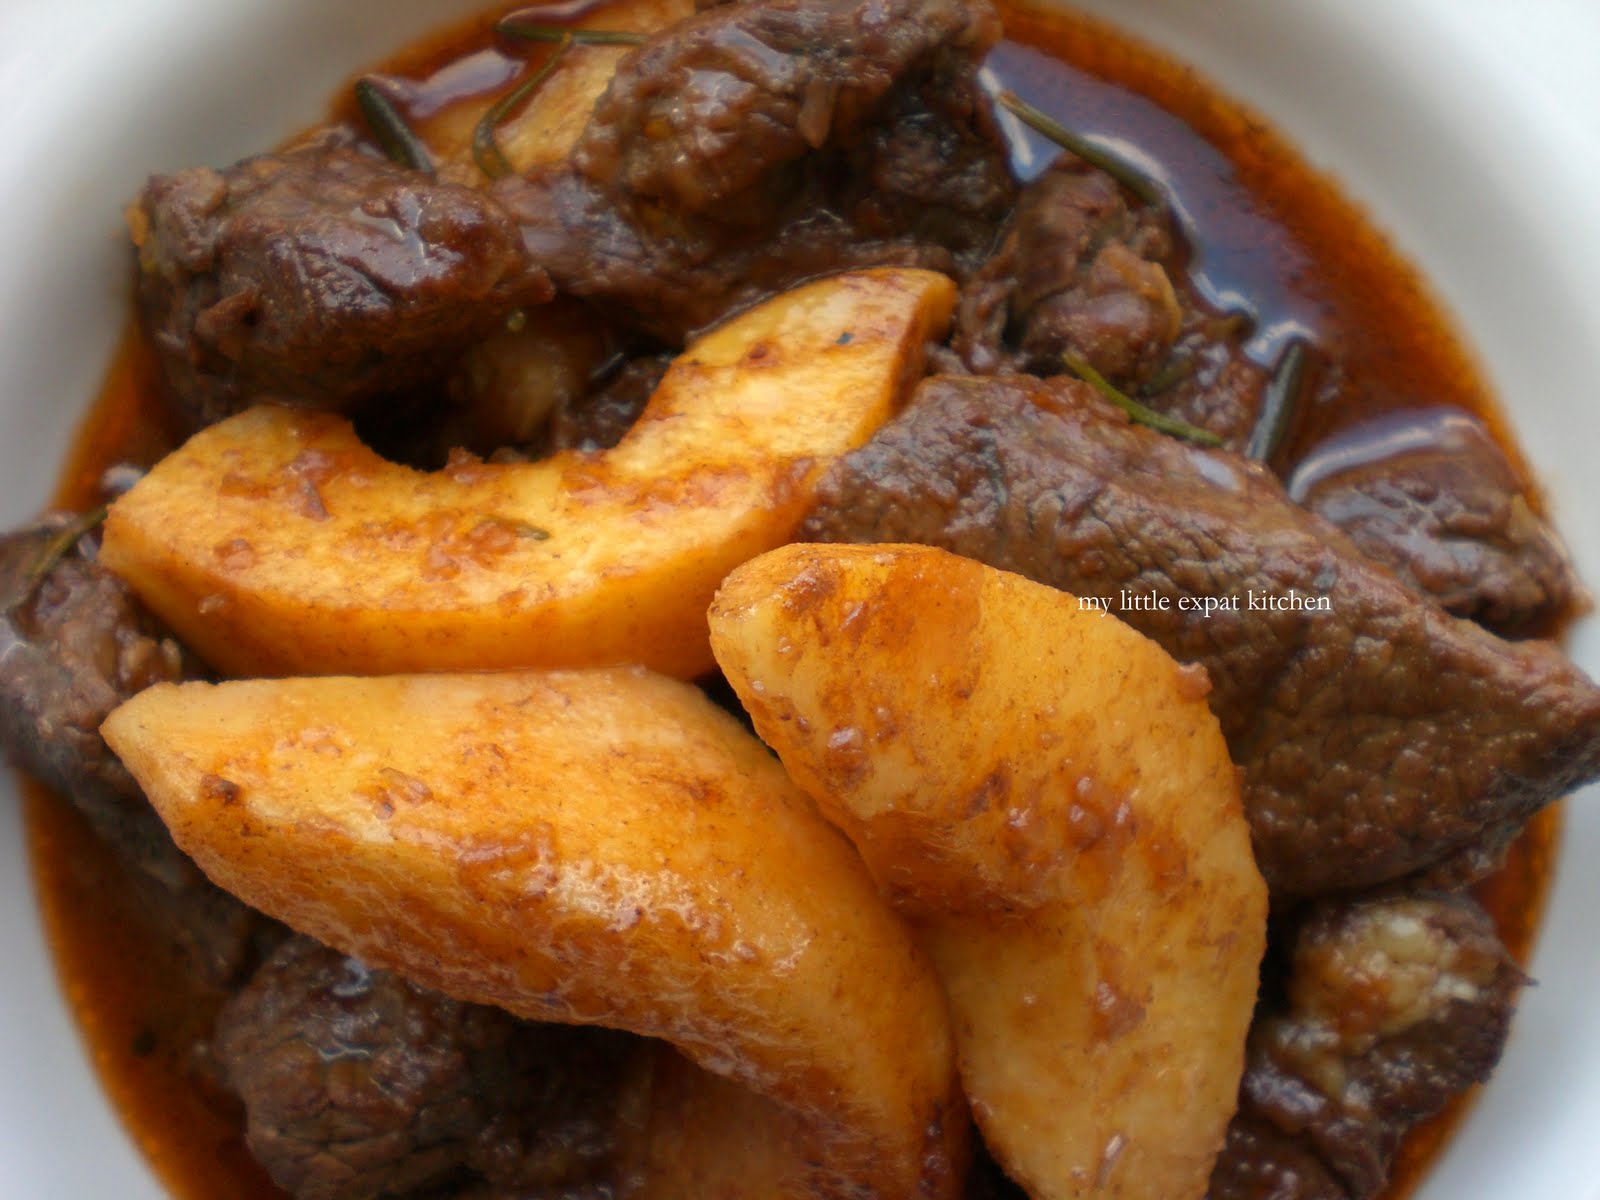
The experience of tasting Sofigado resembles that of a rollercoaster. The sweet flavor of the petimezi and quince, reminiscent of the spoon sweets that Greek grandmothers make, hits you first and then the sourness of the fruit becomes the prominent flavor. The umami-ness of the meat comes to balance out all the flavors and the ride goes on and on until you suddenly end up with an empty plate, asking for more.
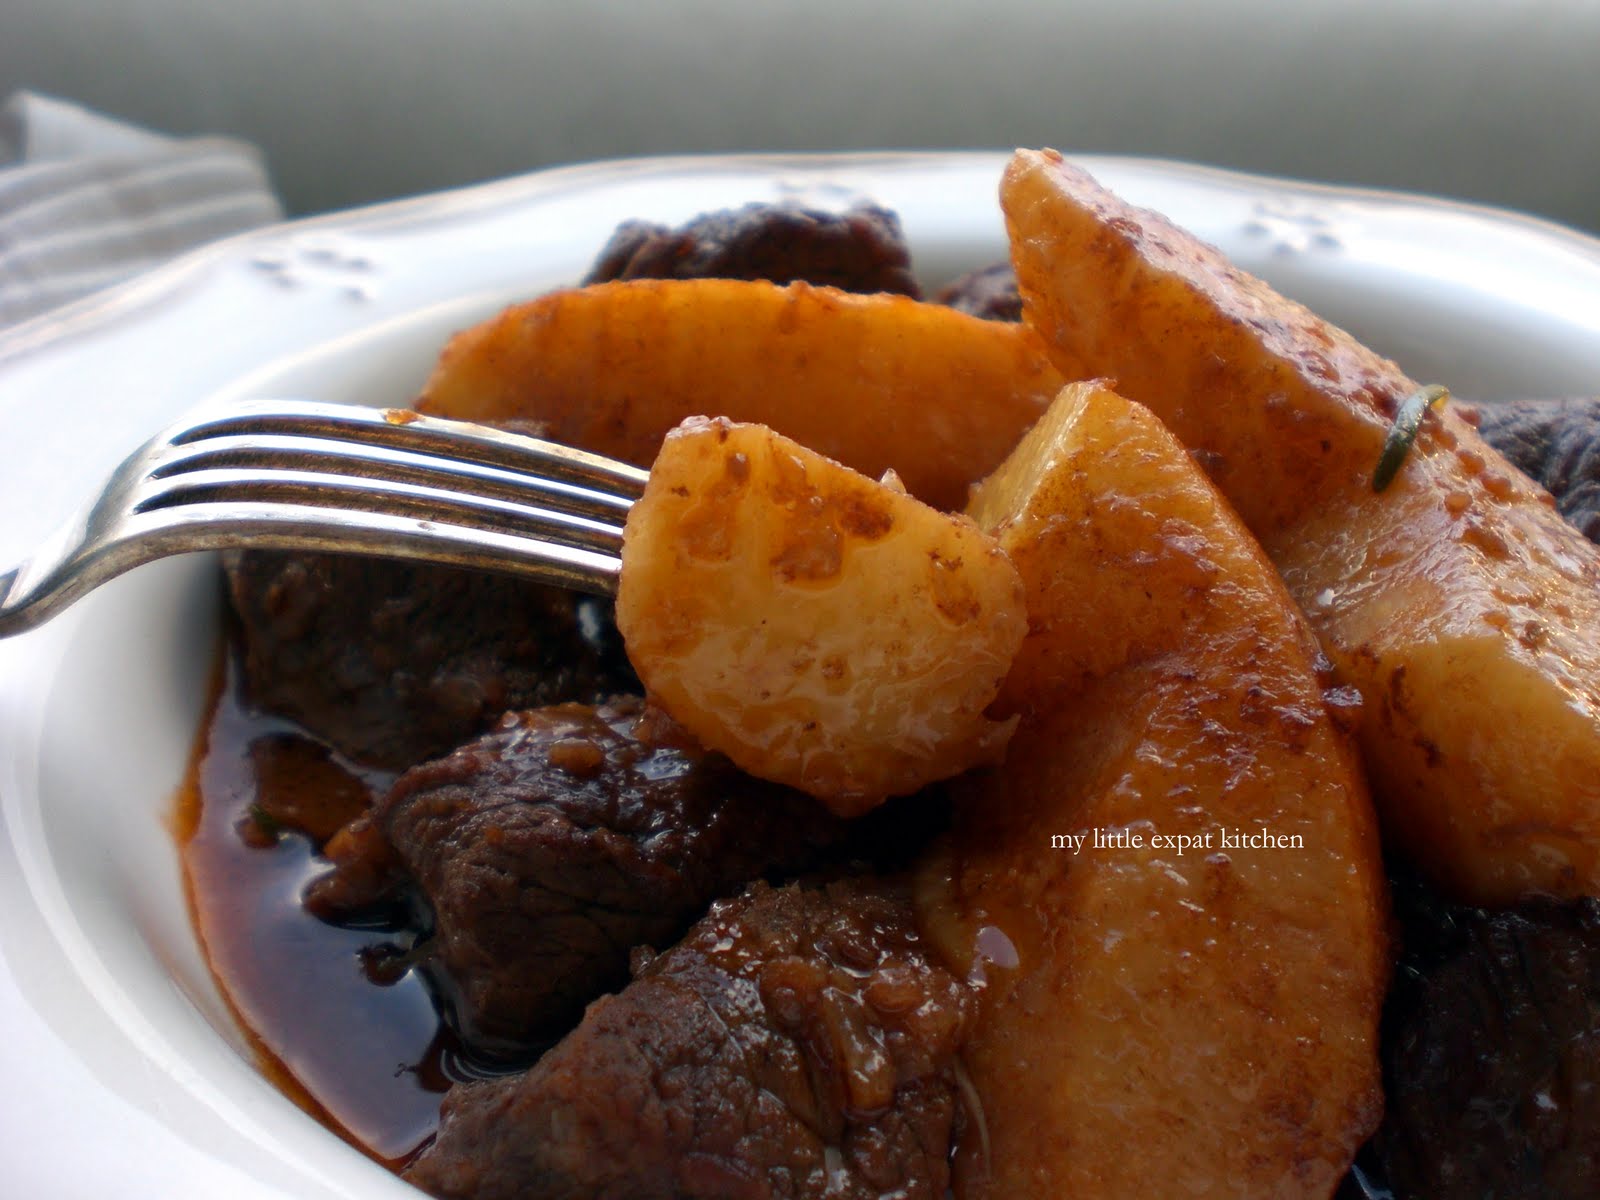
Sofigado Lefkaditiko (Greek Beef Stew with Quinces and Grape-Must Syrup from Lefkada)
Sofigado can be enjoyed by the whole family as an everyday meal but is also elegant enough to become part of a festive holiday meal or a dinner party.
You can accompany it with rice or mashed potatoes for a festive or special meal, and with French fries or a big green salad for an everyday meal.
You can either use beef or veal in this dish.
For those of you living in The Netherlands, the meat you should use is runderriblap.
In traditional Greek cuisine, onions are usually grated in a box grater rather than chopped. This gives a different texture to the resulting sauces, making them thicker and richer. If you can't bother grating the onions in this recipe, you can whiz them in the food processor until they are almost puréed.
The beauty of this dish is in its sweet and sour flavors and contrasting textures of tender, succulent beef in a rich sauce and juicy, soft yet firm quinces.
The more ripe and fragrant the quinces, the better they are for this dish. If they're not ripe, their taste will be too sour, but don't worry, you can rectify that by adding extra petimezi at the end.
You can find petimezi (grape-must syrup / grape molasses) in Greek or Middle Eastern stores.

Yield: 4-6 main-course servings
Ingredients
1 - 1.2 kg boneless beef stewing steak like chuck steak
120 ml good quality olive oil
2 medium-sized red onions (about 250 g), grated
40 ml red-wine vinegar
7 medium-sized garlic cloves, peeled
1 Tbsp tomato paste
Freshly ground black pepper
2 fresh sprigs of rosemary
Pinch of sugar
330-350 ml hot water
Salt
3 large quinces (1 - 1.1 kg), peeled and cut into wedges
100 ml petimezi (grape-must syrup / grape molasses)
Special equipment: pan or Dutch oven with a 5 - 5.5 liter capacity, box grater or food processor
Preparation
Take the meat and cut with a knife the large pieces of fat off, leaving a fair amount of fat on in order to flavor the dish. Cut the meat into pieces, about 6x6 cm each. Place them on paper towels and pat them dry. This is an important step because the meat will not brown properly if it's damp.
In a large, deep, heavy-bottomed pan or preferably in a Dutch oven, add the olive oil and heat over medium-high heat. When it starts to shimmer, add enough beef pieces to cover 2/3 of the bottom of the pan (do not overcrowd the pan because the beef will boil rather than brown) and brown the pieces on both sides. Remove pieces from the pan and place them in a bowl. Brown the rest of the beef pieces in the same manner and place them in the bowl.


Add the grated onions to the pan and sauté them on medium heat for about 4 minutes until they soften and become translucent. Return the browned beef pieces to the pan, along with the juices accumulated in the bowl you kept them in, and add the red-wine vinegar. Stir well with a spatula or spoon and add the garlic cloves, tomato paste, freshly ground black pepper, rosemary sprigs and a pinch of sugar and stir well. Add the hot water (hot so the cooking process won't stop) and stir well. Put the lid on and let it come to the boil. Then turn the heat down to the lowest setting and let the meat stew for 1 - 1 ½ hours or until it is tender (keep in mind though that it'll cook for a further 25 minutes when you add the quinces). Check the meat every 20 minutes or so, stirring it around a bit.
Then, remove the rosemary sprigs (the leaves would have fallen in the sauce) and add salt. The reason you're adding the salt now is because if you add it at the beginning of the cooking process, the beef will become tough and chewy. Add the quinces and the petimezi to the pan and stir well with a spatula or spoon. The quinces must be almost covered with liquid in order to cook, so if there's not enough liquid in your pan, add a bit of hot water. Put the lid back on and allow beef and quinces to simmer for about 25 minutes, stirring every now and then (not with a spatula or spoon, but by holding the pan by its handles and moving it around in circular motions so that everything gets stirred. You're doing that so that you don't break up the quinces. You don't want them to disintegrate into the sauce. They must remain in whole wedges and not become mushy).
Check the quinces after 15 minutes. It's good to taste them at this point and if they're too sour, you can add a little more petimezi to the pan.
You should end up with tender beef in a rich sauce and soft but not mushy quinces. They should hold their form and add texture to the dish.
Serve hot with your favorite accompaniment and make sure to have lots of bread on the table for dipping it in that delicious sauce.
Sofigado tastes even better the second day.


